With
more than 150 Million users worldwide, Avast in The best Free Anty Virus since
‘stone age’.
Many
of us may use Avast but don’t know how to use it perfectly. We can do this by
altering some of the settings within the Anty Virus interface. In this post I
would like to guide you through the standard installation, Activation and Settings
alteration for best performance of the best anty virus.
Installation: The recent versions of Avast have a 'single
click installation'. So need not to worry for guidance. Follow the steps below…
Open the downloaded .exe file and you will see a
welcome screen. Click on ‘Express Install’ to proceed. Uncheck Chrome and Toolbar
if you don’t want.
The installation bar will show u status of
installation.
A quick scan will be performed after a system restore.
This may take few minutes.
That’s it. Setup is being installed successfully..
Activation: Although Avast
is for free, we have to activate to enjoy 1 year validation. All you need to do
is follow the simple steps mentioned below.
After
completion of installation a popup will appear to promote you to paid version, but
use ‘Continue with protection’ option. (In some cases this popup may not
appear)
If
the popup does not appear open avast and use ‘register now’ option.
A
pop up will appear as like above said for 'paid version'. Choose ‘Basic Protection’
A
popup asks our personal information. You can fool it by giving any
name and any ID. Or else you can give correct details.
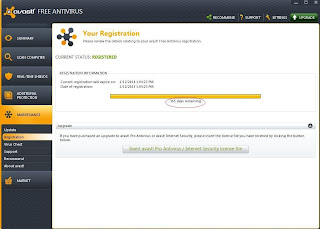
Activation is DONE. Now You can see '365 days remaining message' on
interface.
Settings: Now you have activated
‘Default’ Avast is with you. Let’s change few settings now.
Auto Action: You may have seen that Avast
won’t heal the Viruses itself, instead of healing, it asks us what to do if it
found any virus. If we neglect, the virus simply do its messy business. To make
Avast work itself you have to set ‘AUTO ACTION” settings.
To
enable ‘Auto Action’ go to Scan Computer >> click on’ More details’ on
any of the scan options
Open ‘Settings’ and open
‘Actions’ on the left panel.. Now Change the settings as shown in the Snap shot. Order goes like this {Repair – Move to Chest – Delete}.
Now apply the same settings to
‘PUP’ and ‘Suspicious’ also.
You have just modified the
settings for one type of scan only. Now apply the similar settings to the
remaining scan also (Quick Scan, Fill Scan, Removable Media Scan & Selected
folder Scan)
Popups: The one of the annoying
about avast is its ‘Popups’. There are 4
types of popups in Avast (Info, Update, Warning, Alert). By default these popups will
stay on the screen for 20 seconds, we can change it to minimum.
To change popup
settings go to Settings (on the right side of the interface) >> Popups
>> Change the duration to ‘1’ for all the popups.
It may take few minutes to change settings, but worth a lot as we set the anty virus to do all the work by itself only.


Lengthy....
ReplyDelete